I am not interested in being original. I am interested in being true.
Agostinho da Silva
Monday, 27 June 2016
Sunday, 26 June 2016
The Trials & Tribulations Of Making A Pair Of Goggles
So over a year ago I made a top hat for a steampunk event I was going to in the summer of 2015 (I completely started singing Summer of '69 then - didn't you?).
Well for the same event I also made some goggles, which I've been meaning to write a post about ever since (oh 'meaning to' what good intentions you do have).
So hopefully I can remember what I actually did to make these things, given it was so long ago.
1. Make a paper template. Unfortunately I do not appear to have a picture of my template - I think that's because I actually changed the shape once I started papier macheing so my template is now kind of irrelevant!. But anyway this is for the bit that goes on your face, like the 'surround' bit for the goggles (I don't know how else to subscribe it).
So it basically an egg shape with a circle cut out of it (the circle should be near the wide end of the egg shape), where the actually eye piece is going to be. And remember to mark where the slots will be to attach your fastenings (you need one at each end of the template - one to fasten acoss your nose and one to fasten around the back of your head). You only need one of these as you can use the same template for both sides. Measure it against your face to make sure it will fit.
2. Cut out 2 of the egg shapes in cardboard (if using corrugated cardboard try to cut the shapes out so the corrugated bits run vertically - it will make it easier to shape later on).
3. Put egg shapes to one side (you will notice I tend to jump back and forth between pieces on this project!). Chop off the bottom of two small plastic cups - to the depth you want your goggles to be (shape them to your face), and - only if you want a different coloured lense - cut the middle out of the very bottom of each cup.
4. If you are going to have different coloured lenses and have therefore cut out the middle of each of your goggle pieces then you now need to cut out a piece of coloured plastic to fit the end of your goggles (I used a plastic folder).
*At this point I actually put a thin layer of papier mache on the plastic cups but I don't think it really matters whether you do this or wait until after you've attached the pieces together in the next step*
5. Bend cardboard to fit around the plastic cups (if you're using corrugated and you've cut so the corrugated bits run vertically this is where it comes in handy). Make sure you've got the the right way round, so the pointier end of the egg shape will be pointing towards your ear if you were wearing the goggles and tape the cardboard to the plastic cup. This can be a bit fiddly but perserve.
6. Start papier macheing! I just put a couple of thin layers of newspaper on the whole of the goggles, inside and out, to make sure the goggles and the surround are fully attached. Remember to keep the slots for the fastenings free - you could cut back through them later but they may be difficult to find. Then I went over with a layer of papier mache using kitchen roll/towel. You could also use toilet paper for this or just go straight to painting its up to you. This is the point that I realised that my surrounds was too big and trimmed them down (this was after the first layer of newspaper papier mache).

7. Paint your goggles. You can use whatever colours you want to use on your goggles. The way I did mine was I painted the inside of the goggles black. Then I painted the whole of the outside brown and then went over the actual goggle part in a copper paint. Then I used black paint to paint in the details - screw heads, stitching etc. There isn't any need for neatness as the messier it is the more worn it will look.

8. Stick the lenses in the end of the goggles - you might have to trim them down a little to get them to fit now due to the papier mache adding a bit of thickness to the goggles. I honestly cannot remember what type of glue I used - I think it might have been hot glue... but it could just as easily have been PVA.

9. Attach two pieces together at the nose. I used ribbon to attach my goggles together. When you have a pieces of ribbon that you think is long enough, thread it through both goggles and check that it fits across your nose - of course this doesn't matter if you don't intend to wear the goggles, I just had mine sat on my top hat for the entire event (mainly because the purple plastic I used made everything blurry).
I chose to sew my ribbon in place but hot glue should work just as well.
10. Use another two pieces of ribbon for the back fastening. Make sure you have enough ribbon so you can fasten the goggles round the back of your head and then sew/glue the ribbon in place.
And there you have it after over a year I have finally posted about how I made my goggles. If you have any questions about the goggles please leave them in the comments and I will see if I can answer them (I'm not all that grand at explaining things like this - but if you understood my explanation of the template you can probably understand anything I try to explain - well done!)

Well for the same event I also made some goggles, which I've been meaning to write a post about ever since (oh 'meaning to' what good intentions you do have).
So hopefully I can remember what I actually did to make these things, given it was so long ago.
1. Make a paper template. Unfortunately I do not appear to have a picture of my template - I think that's because I actually changed the shape once I started papier macheing so my template is now kind of irrelevant!. But anyway this is for the bit that goes on your face, like the 'surround' bit for the goggles (I don't know how else to subscribe it).
So it basically an egg shape with a circle cut out of it (the circle should be near the wide end of the egg shape), where the actually eye piece is going to be. And remember to mark where the slots will be to attach your fastenings (you need one at each end of the template - one to fasten acoss your nose and one to fasten around the back of your head). You only need one of these as you can use the same template for both sides. Measure it against your face to make sure it will fit.
2. Cut out 2 of the egg shapes in cardboard (if using corrugated cardboard try to cut the shapes out so the corrugated bits run vertically - it will make it easier to shape later on).
 |
| Plastic cup goggle... things |
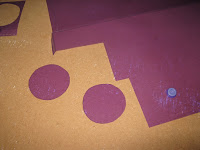
3. Put egg shapes to one side (you will notice I tend to jump back and forth between pieces on this project!). Chop off the bottom of two small plastic cups - to the depth you want your goggles to be (shape them to your face), and - only if you want a different coloured lense - cut the middle out of the very bottom of each cup.

4. If you are going to have different coloured lenses and have therefore cut out the middle of each of your goggle pieces then you now need to cut out a piece of coloured plastic to fit the end of your goggles (I used a plastic folder).
*At this point I actually put a thin layer of papier mache on the plastic cups but I don't think it really matters whether you do this or wait until after you've attached the pieces together in the next step*
5. Bend cardboard to fit around the plastic cups (if you're using corrugated and you've cut so the corrugated bits run vertically this is where it comes in handy). Make sure you've got the the right way round, so the pointier end of the egg shape will be pointing towards your ear if you were wearing the goggles and tape the cardboard to the plastic cup. This can be a bit fiddly but perserve.
 |
| The purple ribbon is just a place holder |

7. Paint your goggles. You can use whatever colours you want to use on your goggles. The way I did mine was I painted the inside of the goggles black. Then I painted the whole of the outside brown and then went over the actual goggle part in a copper paint. Then I used black paint to paint in the details - screw heads, stitching etc. There isn't any need for neatness as the messier it is the more worn it will look.

8. Stick the lenses in the end of the goggles - you might have to trim them down a little to get them to fit now due to the papier mache adding a bit of thickness to the goggles. I honestly cannot remember what type of glue I used - I think it might have been hot glue... but it could just as easily have been PVA.

9. Attach two pieces together at the nose. I used ribbon to attach my goggles together. When you have a pieces of ribbon that you think is long enough, thread it through both goggles and check that it fits across your nose - of course this doesn't matter if you don't intend to wear the goggles, I just had mine sat on my top hat for the entire event (mainly because the purple plastic I used made everything blurry).
I chose to sew my ribbon in place but hot glue should work just as well.
10. Use another two pieces of ribbon for the back fastening. Make sure you have enough ribbon so you can fasten the goggles round the back of your head and then sew/glue the ribbon in place.
 | ||
| Ta Dah! |

Monday, 20 June 2016
Random Quote #288
Every time you are tempted to react in the same old way, ask if you
want to be a prisoner of the past or a pioneer of the future.
Deepak Chopra
Deepak Chopra
Monday, 13 June 2016
Sunday, 12 June 2016
Previously On Creatively Speaking...
 Creatively Speaking came about on my other blog - the Creative Life (which may or may not still exist when you read this).
Last year when I challenged myself to do something creative every day (which I managed - all except my birthday - but if you are going to take a day off!). From March last year until the end of the year I also included doing something writing related every day.

So with the decision to condense my two blogs in to one I also decided to move Creatively Speaking over to this blog.
It's taken me a while to get round to this since deciding to cease writing on my other blog (but I have mentioned that I can be quite a lazy blogger!)
 So here's how I think Creatively Speaking will evolve now it has moved. I will continue posting about my recent (hopefully) creative output (hopefully every week) but will intersperse these posts with posts about other creative things - there's a whole world of creative YouTubers out there!
Speaking of YouTubers on my old creative blog I also occasionally posted links and videos that I had found motivational and/or helpful, something I plan to continue over here.
Til the next Creatively Speaking post (which, as this was a recap, will technically be the first).
Monday, 6 June 2016
Random Quote #286
Some things in life are out of your control. You can make it a party or a tragedy.
Nora Roberts
Nora Roberts
Wednesday, 1 June 2016
NaNoWriMo Countdown
June is here! And hopefully with it some sunnier and warmer weather (especially here in the UK). But anyway there are now only
to go until the start of NaNoWriMo 2016! :)
153 Days
to go until the start of NaNoWriMo 2016! :)
Subscribe to:
Posts (Atom)