So first and foremost here are the locations of my inspiration when it came to making this hat - a video by Pins and Things and a post from Lost Wax.
So I didn't follow these tutorials exactly. And now that I have finished the hat there are things that I would do slightly differently if I ever made another one (because who doesn't want multiple top hats?).
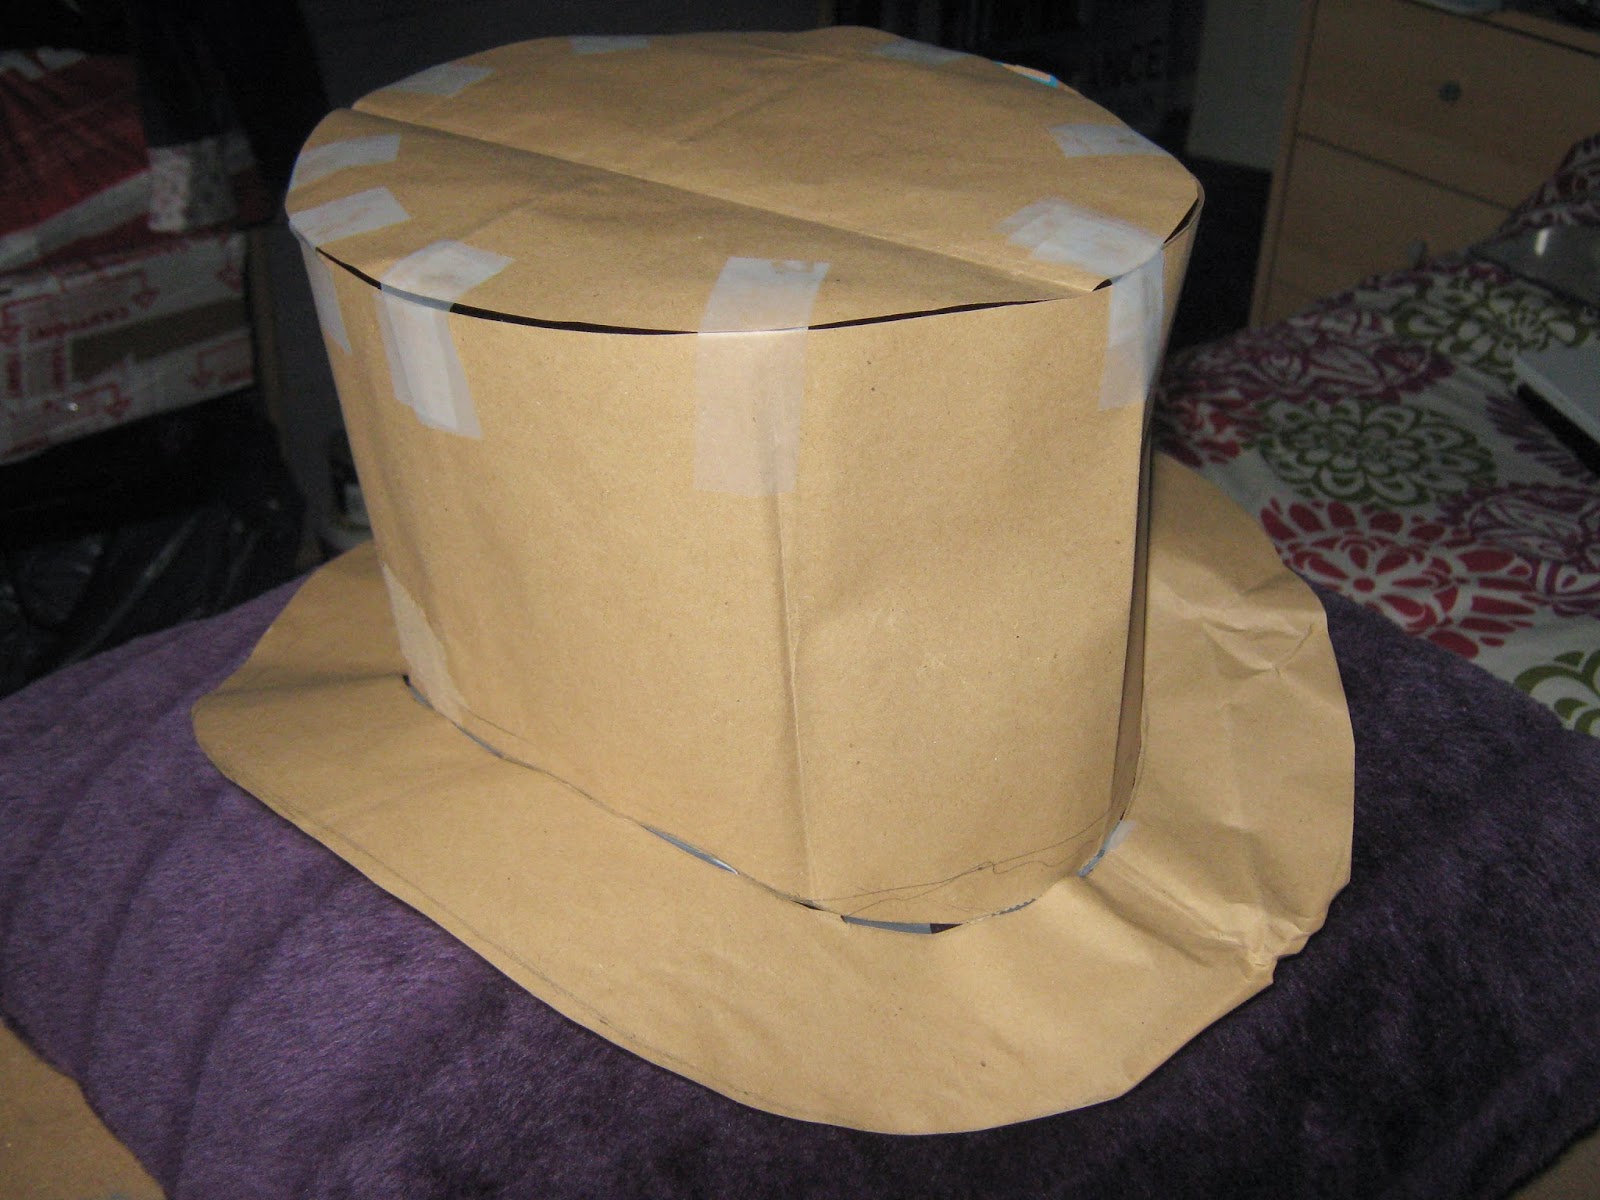 So first I followed the video however I made the hat out of paper first to make sure it fit. That way I could also check how tall the hat was going to be and if it looked alright on me. The main measurement you need is the circumference of your head. I think I made the hat 7 inches tall and then cut it down. I also used inspiration from the Lost Wax post to shape the bottom of the main part of the hat.
This is the part to work out your main problems - make sure the brim is going to fit the bottom of the hat given that the hat isn't just a flat oval (oh yeah I forgot to mention I made the hat oval shaped not round... but we are still in the prototype stages of this post). Now here is what I would have done marginally different if I made another one - although the prototype fits fine the finished product is a little bit tight on my head. So I reckon I'd increase the circumference by about an inch or so.
So once you have got the paper hat correct and how you want it you then have to take it apart again. This will give you your template pieces.
 I started off by forgetting about the brim for a while. I made the main body of the hat and stuck the top on. I mainly used tape with a bit of white glue (although when I go to the felt stage I did zip round the inside with my glue gun just to be sure).
This is where the template comes in useful as I don't think I could have down the curve free hand and got it even on both sides.

 It was at this point that I decided the brim was too wide, so I trimmed about half an inch off it. In my opinion this made the sides, where I bent them look a little better.
So that is the actual hat finished. At this point you could just paint it or cover it in something. I chose to cover mine in felt, which we will cover in part 2 - click here for that.
No comments:
Post a Comment